Labels
Labels mark tasks across your category structure. A category answers the question "where does this task live?", and labels answer everything else, like which client it's for and whether it's billable.
You can put labels inside other labels
The one at the top defines a tree, and a tree works well as a field, with the labels under it as the answers:
Billing
├── Billable
└── Non-billable
Client
├── Fjordvik Bakery
└── Nordlys Consulting
Urgent
You assign labels in the task editor. In the label picker you can search the
whole tree, so typing "ins" finds Channel › Instagram. You can also make new
labels as you go, by typing Client > New Name to build the path.
By default a task carries one label from each tree, so when you assign Billable it replaces Non-billable. That's what makes a tree work like a field.
If a tree should allow several labels at once, you can turn that on for it. See One label from each tree and Allowing several labels per task.
Every label can have its own colour
A sub-label takes its parent's colour unless you give it one of its own, and the deepest colour you set wins.
The label's chip shows that colour everywhere it appears.
You decide which labels show on your rows
Label chips on List rows are off until you turn them on, and you do it per tree, so your rows only show what you care about. Open a tree's top label on the Labels page and turn on Show in List view.
After that, the rows show the label's name in its colour, and you get the full path if you hover it. The tree also gets an eye badge on the Labels page, so you can see at a glance which ones do this.
This only changes what the rows show you, and it's your own setting. The labels themselves are shared with everybody in the workspace, but the chips on your rows are yours, like your favourites.
The filter always offers you every label either way.
Filter by label in List and Calendar
When you pick labels in the Filter button:
- If you pick several labels inside one tree, you get tasks with any of them.
- If you pick labels in different trees, you only get tasks that have all of them, so Billable and Fjordvik Bakery.
- If you pick a parent, you get everything under it.
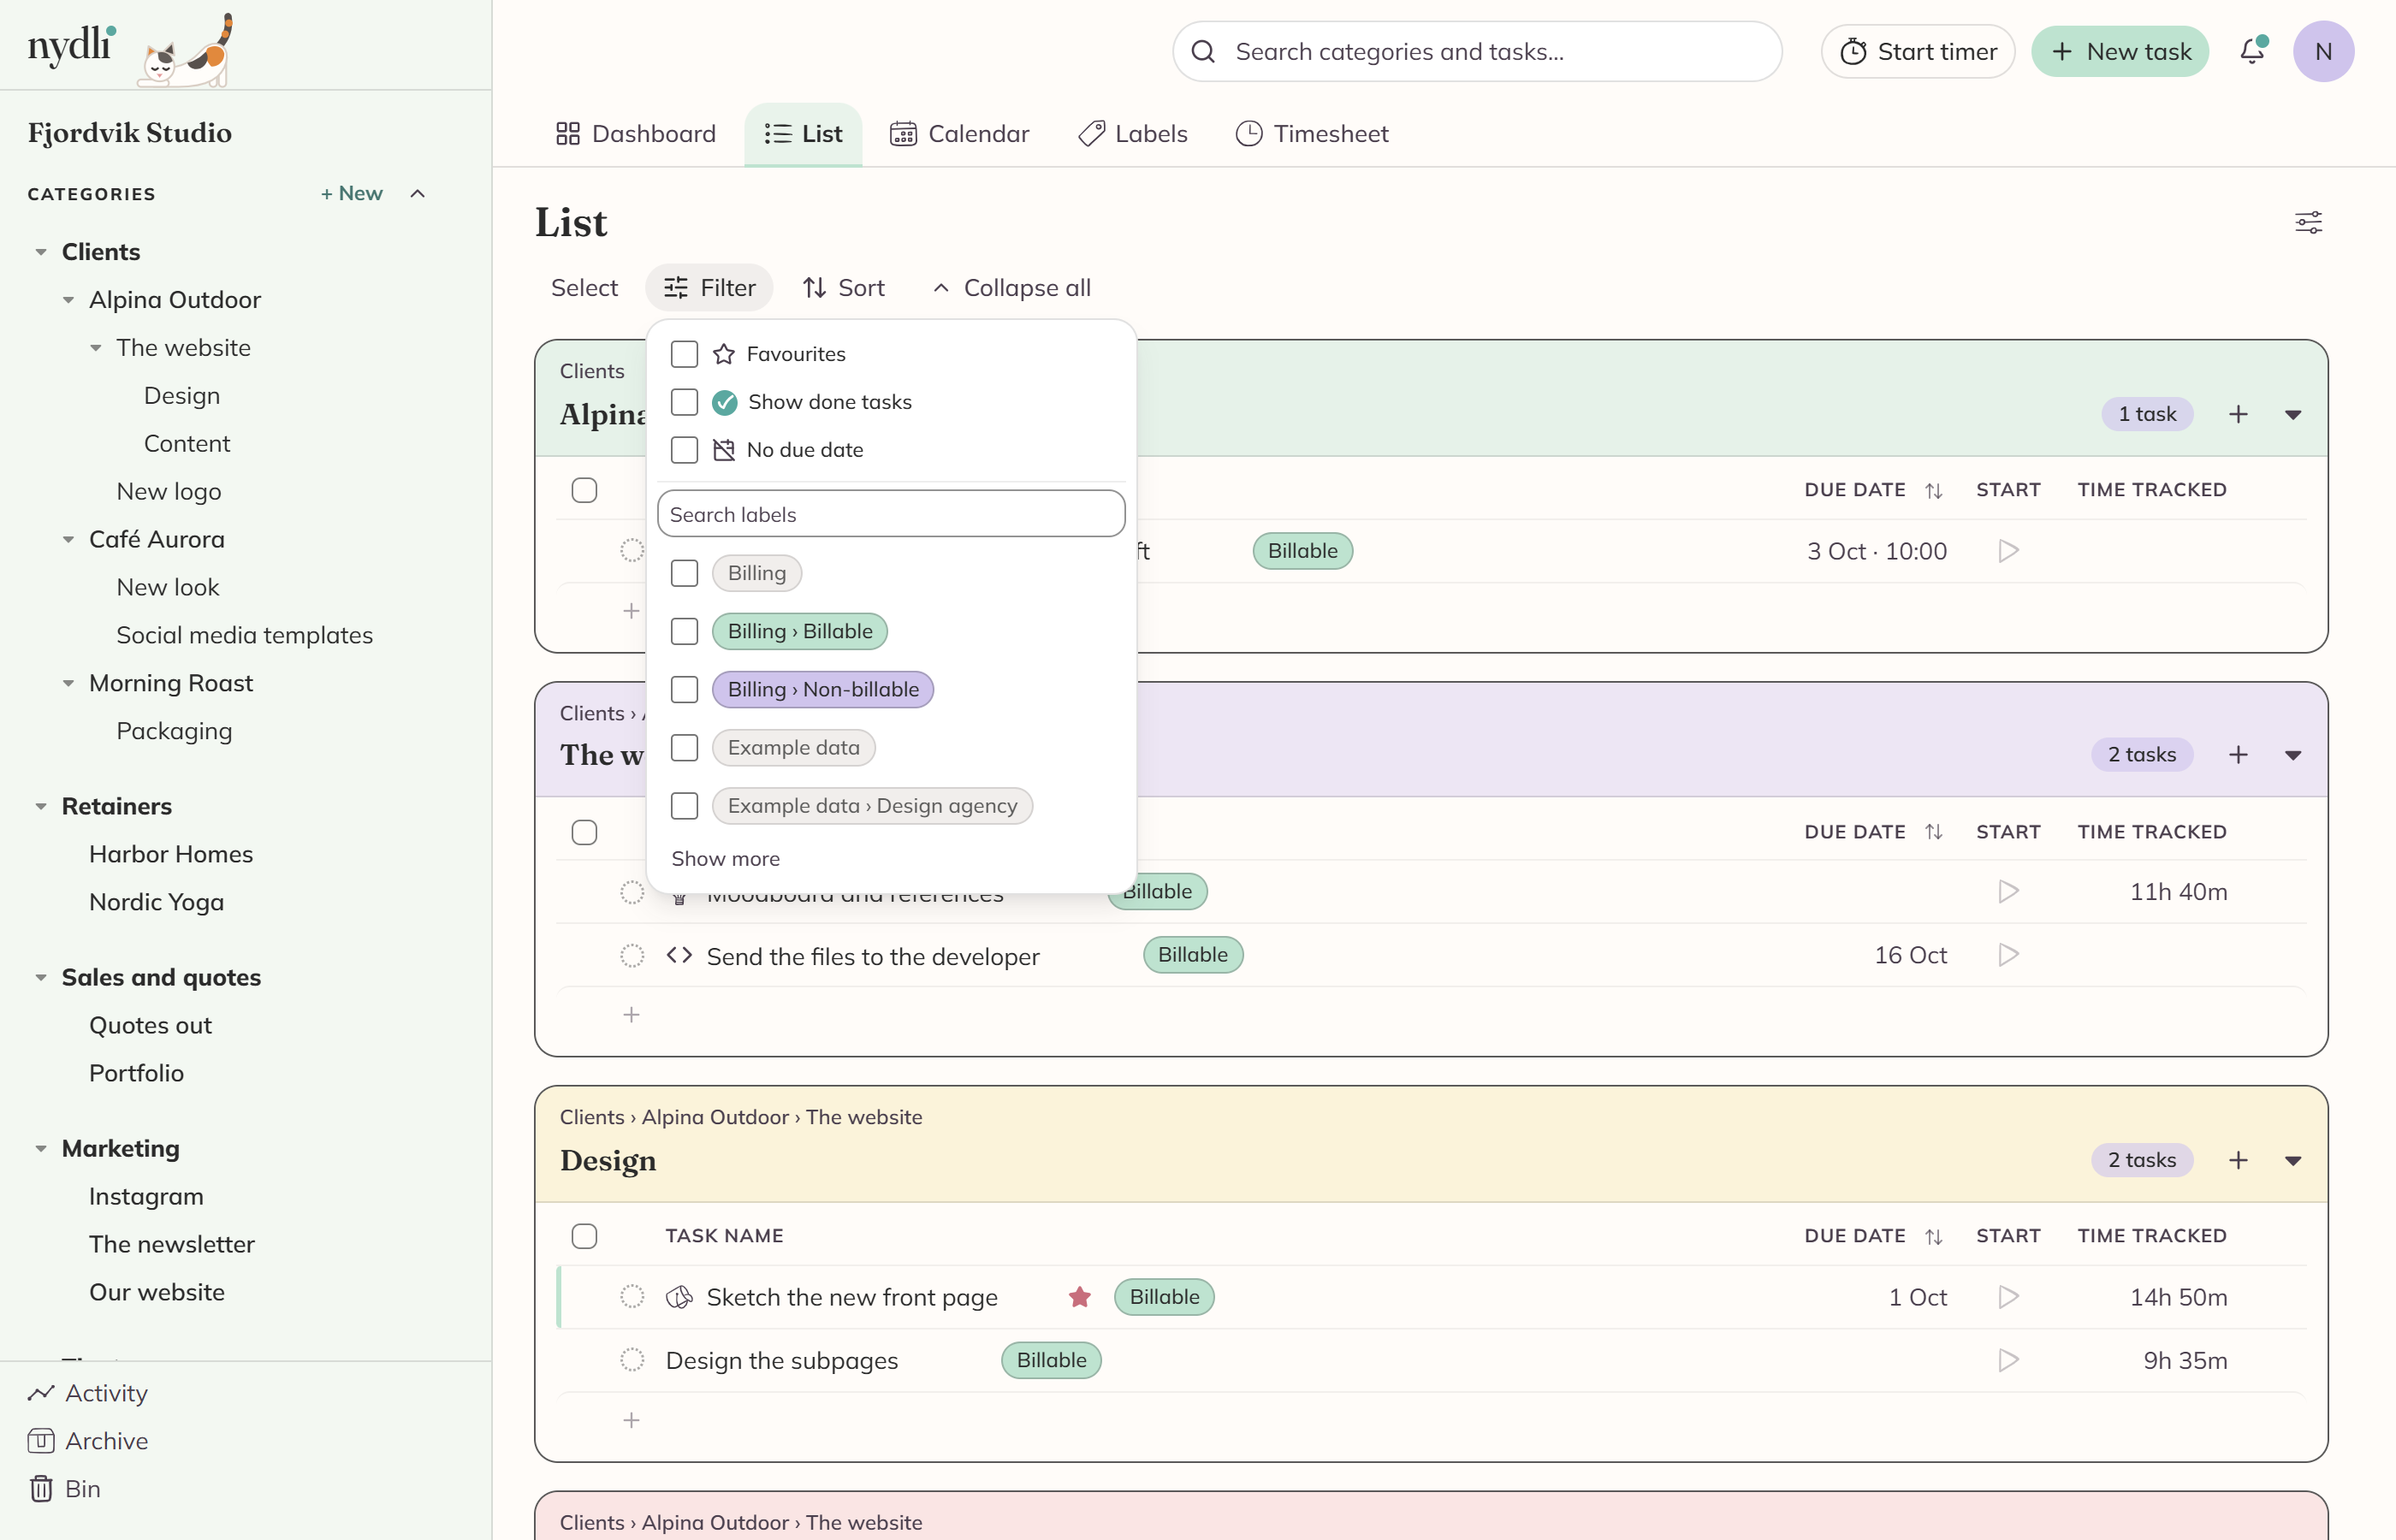
The same panel holds the filters that aren't labels. You'll find Favourites, Show done tasks and No due date there, and Assignee once there's somebody else in the workspace.
Your filters are part of the page address, so you can bookmark a filtered view or send it to somebody else in the workspace.
You manage them all on the Labels page
It lists every tree, with a count of how much each one is used, and you can sort it A to Z or by that count. From there you can:
- Create, rename and recolour labels
- Delete them
- Open a label's own page to see every task that carries it
When you delete a label that has sub-labels, they all go with it. Nydli asks you to confirm when the labels are in use.
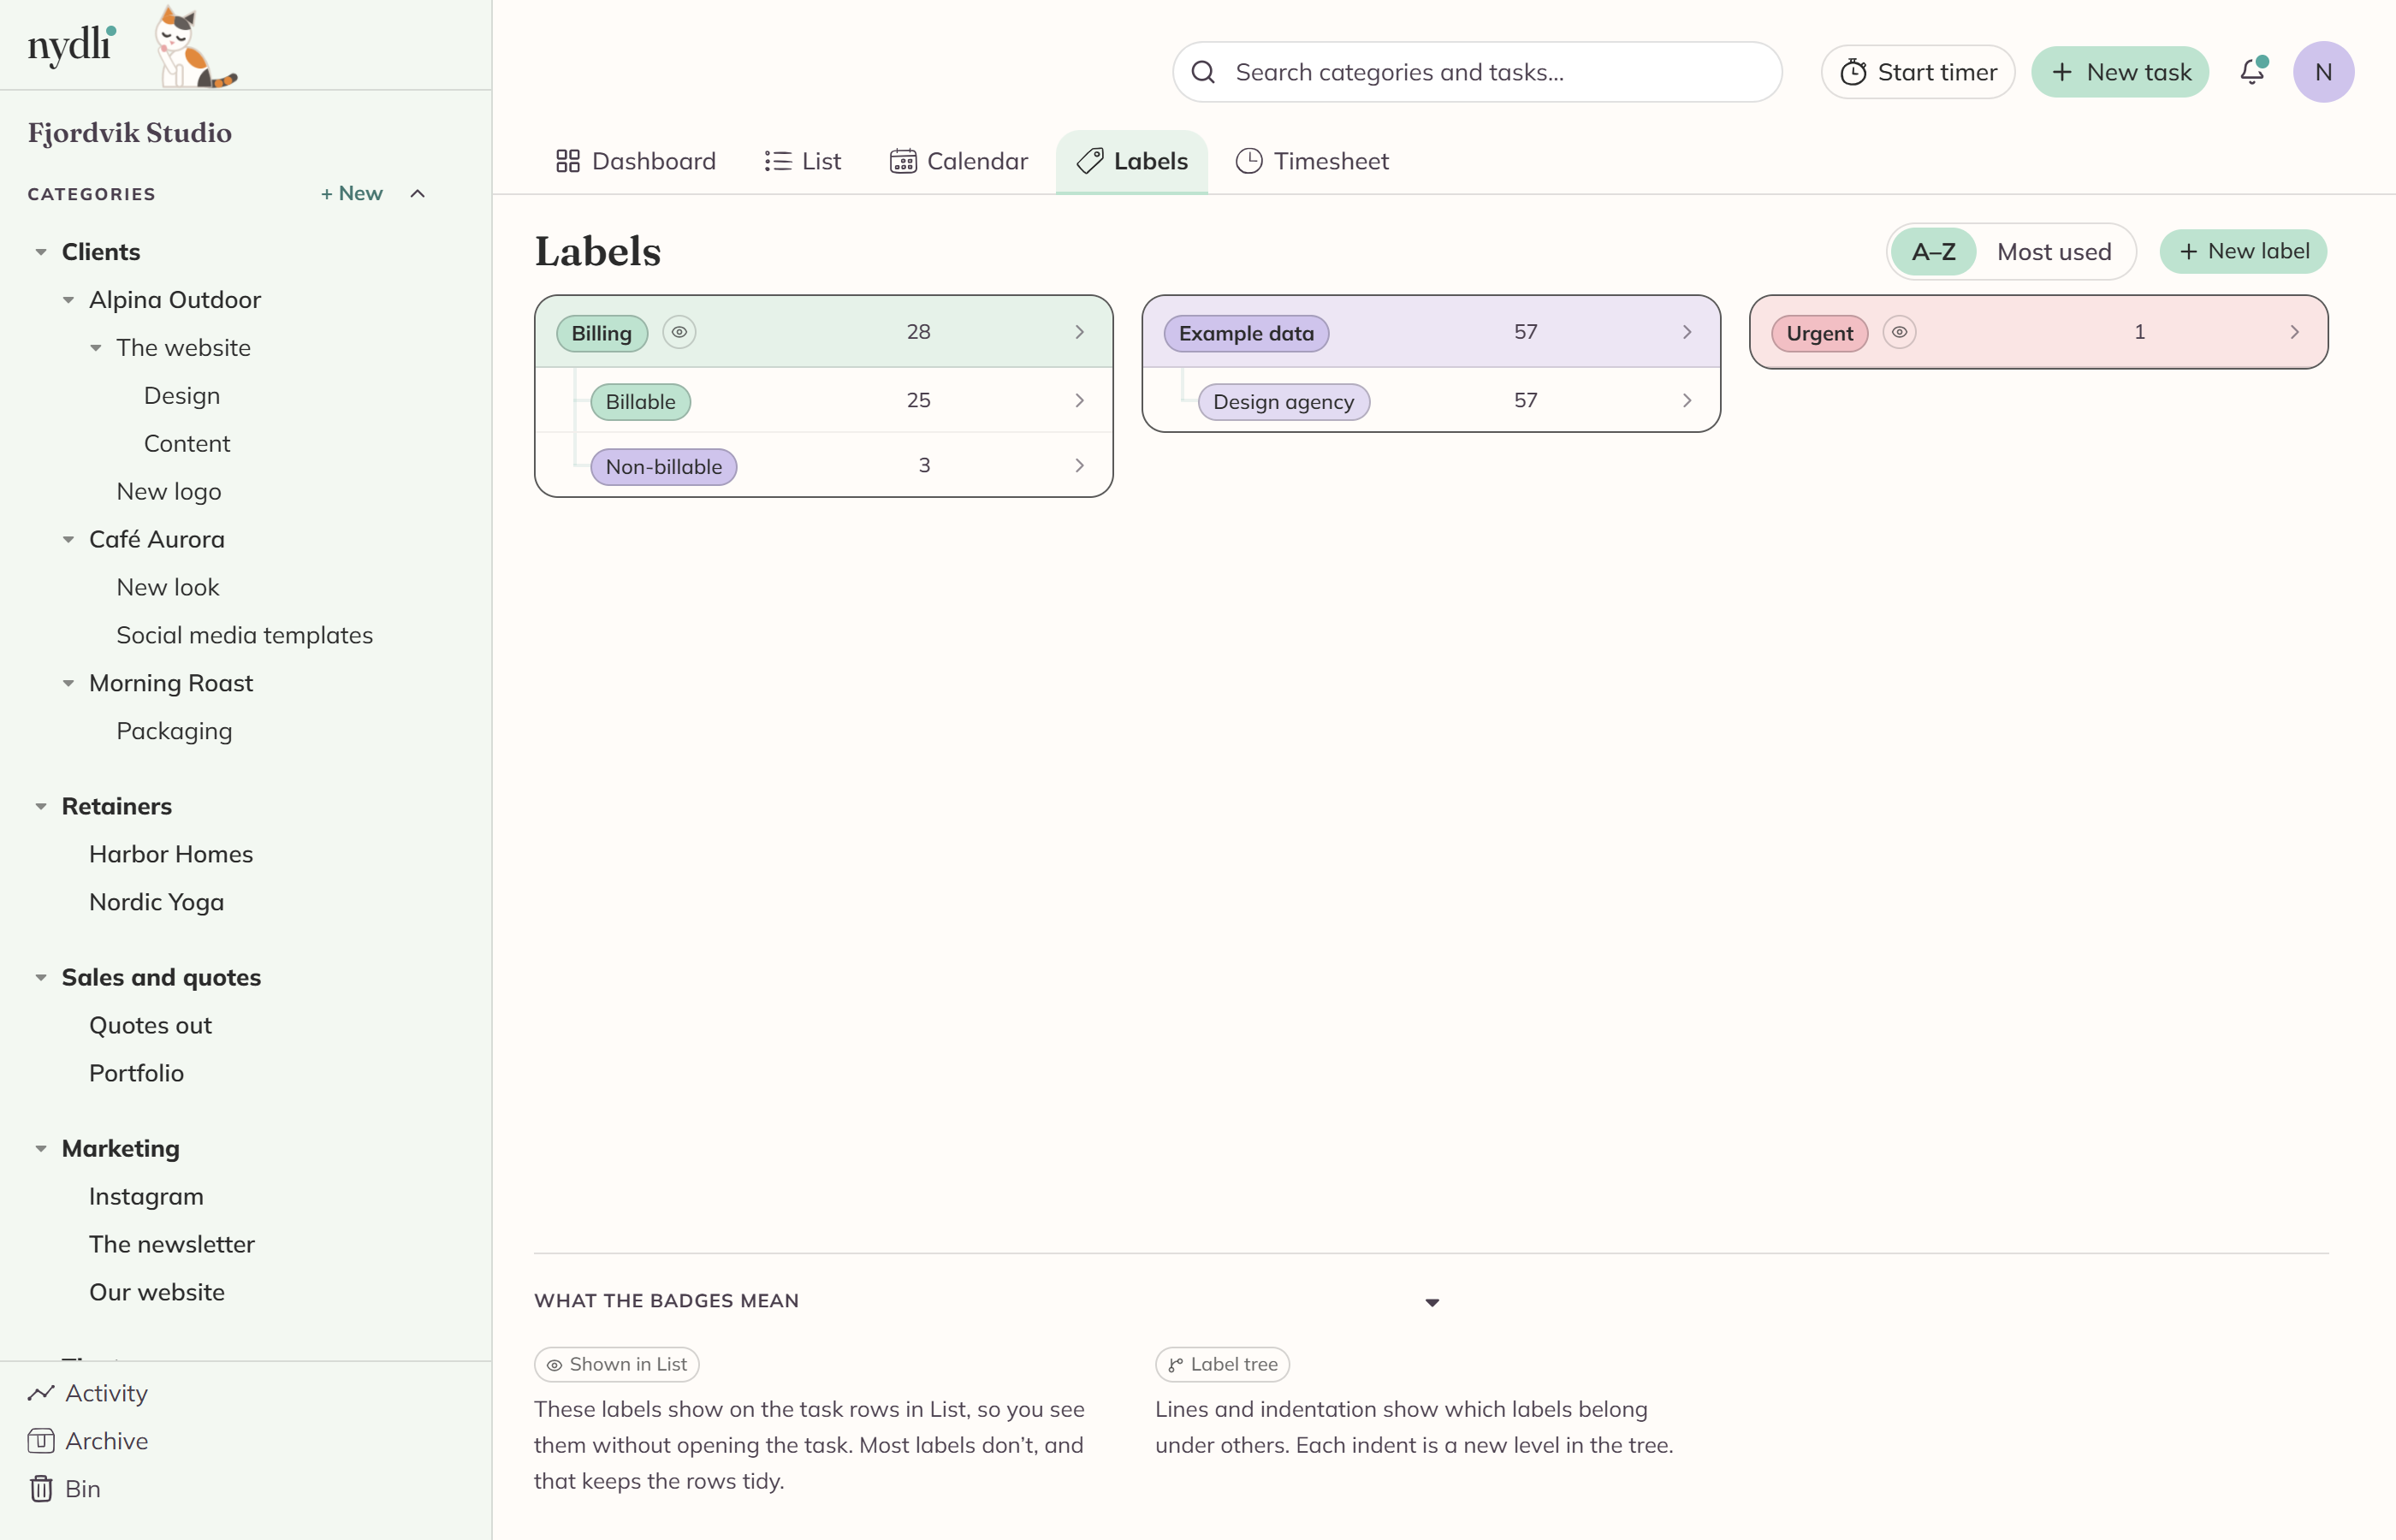
The badges at the top of a tree tell you what it does, and there's a key at the foot of the page that spells them out. An eye means the chips for that tree show on List rows, and layers means a task can carry several labels from it.
Every label has a page of its own. It lists all the tasks carrying that label, grouped by category or by due date, and from there you can add the label to more tasks or take it off several at once.